Winter brings a specific kind of beauty, with frost-covered mornings and snow-capped homes. However, beneath that picturesque layer of white lies a potential nightmare for homeowners: water damage. While most people assume their shingles or tiles are enough to keep the elements out, standard roofing materials are designed to shed water, not hold standing water.
This is where a robust defence system becomes vital. If you live in an area prone to snowfall or freezing temperatures, relying solely on your outer roof layer is a gamble. To truly protect your home’s structure and interior, you need a secondary layer of protection known as an ice shield.
This component is often unseen, sitting quietly beneath your visible roof, yet it plays a critical role in keeping your home dry. In this guide, we will explore exactly what an ice shield for roof protection is, how it works, and why it is an absolute necessity for modern homes.
The Cold Hard Truth: What is an Ice Dam?
To understand the solution, we must first understand the problem. The primary enemy an ice shield fights against is the ice dam.
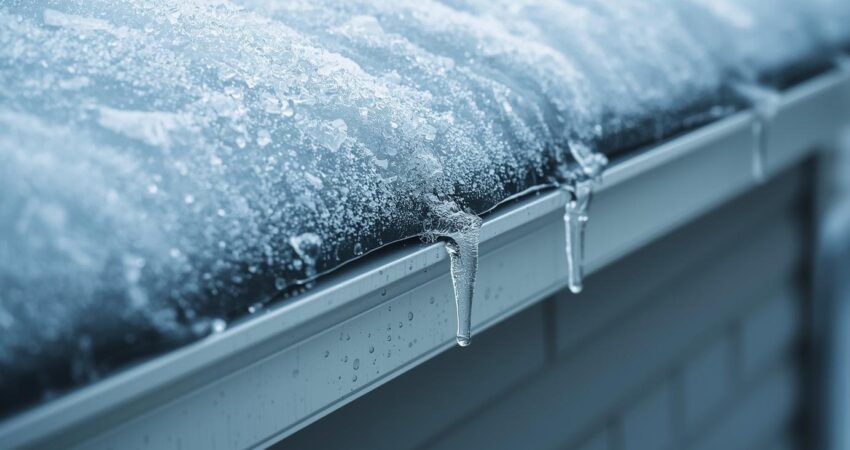
An ice dam forms when the snow on the upper sections of your roof melts. This melting usually occurs because heat from your home’s interior escapes into the attic, warming the roof deck. As this meltwater runs down the slope of the roof, it eventually reaches the eaves (the edges of the roof).
Since the eaves extend beyond the walls of the heated house, they remain much colder. When the meltwater hits this freezing zone, it refreezes. Over time, this ice builds up, creating a literal dam or ridge of ice at the edge of the roof.
Here is where the issue arises: as more snow melts higher up, the water runs down and hits the dam. Because it cannot drain off the roof, it backs up. It pools behind the ice dam and, gravity being what it is, seeks the path of least resistance. Unfortunately, that path is often underneath your shingles or tiles. Once water gets under the primary roofing material, it can seep into the roof deck, insulation, and eventually, your ceiling and walls.
Why You Need a Roofing Ice and Water Shield
This is where the ice shield proves its worth. An ice shield (often called an ice and water barrier roof product) is a waterproof membrane installed directly onto the wood roof deck, underneath the shingles or tiles.
A Waterproof Seal
Unlike traditional roofing felt (which is water-resistant but not waterproof), an ice shield is made from modified bitumen or rubberized asphalt. It creates a watertight seal. Even if an ice dam forces water to back up under your shingles, the ice shield prevents that water from touching the wood deck.
Sealing Around Fasteners
One of the most impressive features of an ice and water shield for roofing is its ability to seal around nails. When shingles are nailed down, they puncture the underlayment. With standard felt, water can trickle down the shank of the nail and rot the wood. A rubberized ice shield, however, is self-sealing. The material is sticky and elastic; it tightens around the nail as it is driven through, creating a gasket-like seal that water cannot penetrate.
preventing Costly Repairs
The damage caused by ice dams is not cheap to fix. You are looking at replacing sodden insulation, repairing rotted roof sheathing, treating mould growth, and repainting water-stained drywall. Investing in a proper shield is a fraction of the cost of these potential repairs.
Where Should Ice Shields Be Installed?
Because ice shields are a premium product, they are rarely installed over the entire roof surface unless the roof has a very low pitch (slope). Instead, they are strategically placed in the areas most vulnerable to leaks and ice dams.
The Eaves
This is the most critical location. Building codes in many cold climates require an ice shield to be installed along the eaves. It should extend up the roof to a point that is two feet inside the exterior wall line of the building. This ensures that even large ice dams cannot push water high enough to bypass the barrier.
Valleys
A roof valley is where two roof slopes meet, channelling a high volume of water runoff. These areas are notorious for leaks because snow accumulates here, and the water flow is heavy. Installing a roofing ice and water shield down the centre of the valley provides essential reinforcement.
Roof Penetrations
Anywhere you cut a hole in the roof—for chimneys, skylights, plumbing vents, or exhaust fans—you create a potential leak point. Wrapping these penetrations in an ice and water barrier creates a tight seal that flashing alone sometimes cannot achieve.
Types of Ice Shields
Not all shields are created equal, and the market offers a few variations depending on your specific needs and budget.
Granular/Sand Surface
These shields have a surface texture similar to sandpaper or asphalt shingles. The primary benefit here is safety for the installers; the rough surface provides traction, making it less slippery to walk on during installation.
Smooth/Film Surface
These have a smooth, plastic-like surface. They generally provide an excellent seal but can be slippery for roofers. They are often used in high-temperature applications, such as under metal roofs, because they can withstand higher heat without degrading.
High-Temperature Shields
If you have a metal roof (which conducts heat) or live in a region with intense summer sun, you may need a high-temperature ice shield. These are formulated to resist becoming too “flowy” or sticky in high heat, ensuring they maintain their integrity year-round.
How to Install Ice Shields
While installation specifics can vary by manufacturer, the general process ensures a watertight bond with the roof deck.
- Preparation: The roof deck must be clean, dry, and free of debris. Any protruding nails or rough patches should be smoothed out to prevent puncturing the membrane.
- Alignment: The installer aligns the roll at the eaves, ensuring it is straight.
- Adhesion: Most modern ice shields are “peel-and-stick.” The backing paper is peeled away (often in split sections to make it manageable), and the membrane is pressed firmly onto the wood deck.
- Rolling: To ensure a full bond, a weighted roller is often used over the surface. This presses the adhesive into the texture of the wood.
- Overlapping: If multiple rows are needed, they must overlap by several inches (usually marked on the product) to ensure water flows over the seam, not into it.
When to Consider Professional Installation
While the peel-and-stick nature of the product might sound like a DIY-friendly project, installing an ice shield for roof protection is deceptive.
The adhesive is incredibly strong. Once it touches the wood, it bonds instantly. If you lay it down crooked or with wrinkles, you cannot simply pull it up and try again; you usually have to cut it out and waste the material. Wrinkles can also prevent shingles from laying flat, ruining the aesthetic of your roof.
Furthermore, roofing work is inherently dangerous. Working at the edge of a roof to install a barrier along the eaves puts you at significant risk of falling. Professional roofing contractors have the safety equipment, the specific tools (like weighted rollers), and the experience to install the shield perfectly smooth and tight. Given that this is your last line of defence against water damage, professional installation ensures the warranty remains valid and the product performs as intended.
Maintenance Tips for Ice Shields
Once installed, the ice shield is covered by shingles and requires no direct maintenance. However, you can maintain the system to ensure it isn’t overwhelmed.
- Keep Gutters Clean: Clogged gutters are a primary cause of ice dams. If water cannot drain, it fills the gutter and freezes, creating a base for an ice dam to build upon.
- Attic Inspection: Ensure your attic is well-ventilated and insulated. Keeping the roof deck cold prevents the snow from melting unevenly, stopping the ice dam cycle before it starts.
- Roof Inspection: Have a professional inspect your roof periodically. If shingles are missing or damaged, UV rays can eventually degrade the ice shield underneath.
Shield Your Home from Winter
An ice and water barrier roof system is not just an optional extra; in many climates, it is an essential component of a healthy home. It provides peace of mind during the harshest winter storms, ensuring that melting snow remains outside where it belongs, rather than dripping onto your attic insulation.
By understanding how ice dams form and the mechanics of a proper roofing ice and water shield, you can make informed decisions about your roof replacement or repair. Don’t let the next winter freeze result in a spring renovation project.
Secure your home against the elements today.
For expert advice and flawless installation, contact Tier 1 Roofing and Exteriors at 513-295-3487. Let us help you protect your investment with professional roofing solutions.